CollectMax allows you several options with the Document Management Module. Prior to using the module, you will need to access the image options to set the Image Directory.
From the menu bar of CollectMax, select System, Imaging, Options
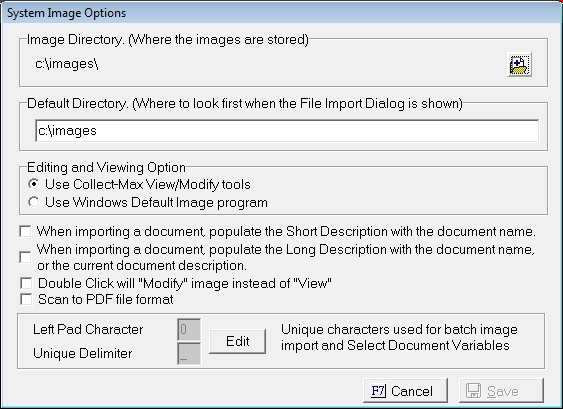
To display the System Image Options Screen.
Click the  button to display the Image Archive Add Screen.
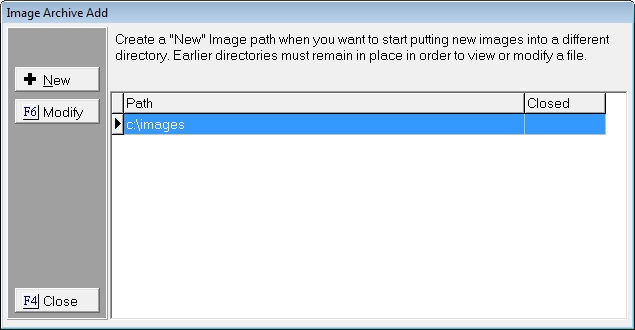
Click the  button to display the Add Image Directory Screen.

Enter the directory where the images should be saved. JST Recommends using a UNC path to eliminate issues with different workstations being mapped differently.
Click the  button to save the image directory.
Once the current image directory becomes too large to complete a nightly backup, CollectMax allows you to setup a new directory. This directory will be used to save all new images but all old images will still be available for accessing, printing, modifying and exporting.
See above Adding an Image Directory for instructions for adding a new directory and archiving the old directory.
When importing images, select the default directory to look for images. Once selected, the next image to be imported the browse menu will default to the selected directory.
Enter the directory location.
When choosing to view or modify tiff, bitmap and jpeg images, you have the option of using the CollectMax default viewer or a Microsoft Windows Default viewer. Click the  button next to the appropriate selection. This setting is system wide. If choosing the Microsoft Windows Default viewer and a workstation does not have a default viewer, the image will open for viewing.
Select any options that apply, by clicking the  box next to the option.
Document Name in Short Description: When importing the image, add the document name as the description.
Document Name in Long Description: When importing the image, add the document name as the details.
Double Click Modify: Change the double click to view the document into double click to modify the image.
Scan To PDF: Set the manual scan of image to save the image as an Adobe Acrobat PDF format.
Batch Image Import requires specific file names. The file names requires ten digit account numbers. If the account number is not ten digits long, the account number must be made to be 10 characters long by left padding then number. Typically that number is 0. However, you can change that character by replacing the Left Pad Character. Please note your images will have to be saved using the new character.
Batch Image Import will import more than one image for an account at the same time. However each image requires a file name delimiter that allows multiple image files for each account. Typically that delimiter is _. You can change that character by replacing the Unique Delimiter. This delimiter must not be a character that would be used in the file name elsewhere. Please note your images will have to use the delimiter on multiple images.